Data are the backbone of your application. They hold all of your data and are the starting point of your application. The first step in creating a database-driven web application is to hook data. Data are represented in the table in rows and columns. Each row is called a ‘record’. Data can be submitted to them through web forms or imported from external files. Data can also be exported.
At the moment of this writing, ZenBase supports importing of comma-separated values (CSV) files only. If you have Excel sheets you’d like to import into ZenBase, you should export these as CSV files from Excel first after which you can import the data into ZenBase.
Note that table name should not contain space or any special characters.
After clicking the button, you should start off by entering a name for your new table. Note that the name should only contain only alphanumeric characters: a-z, 1-9, underscored and dashes, NO SPACES.
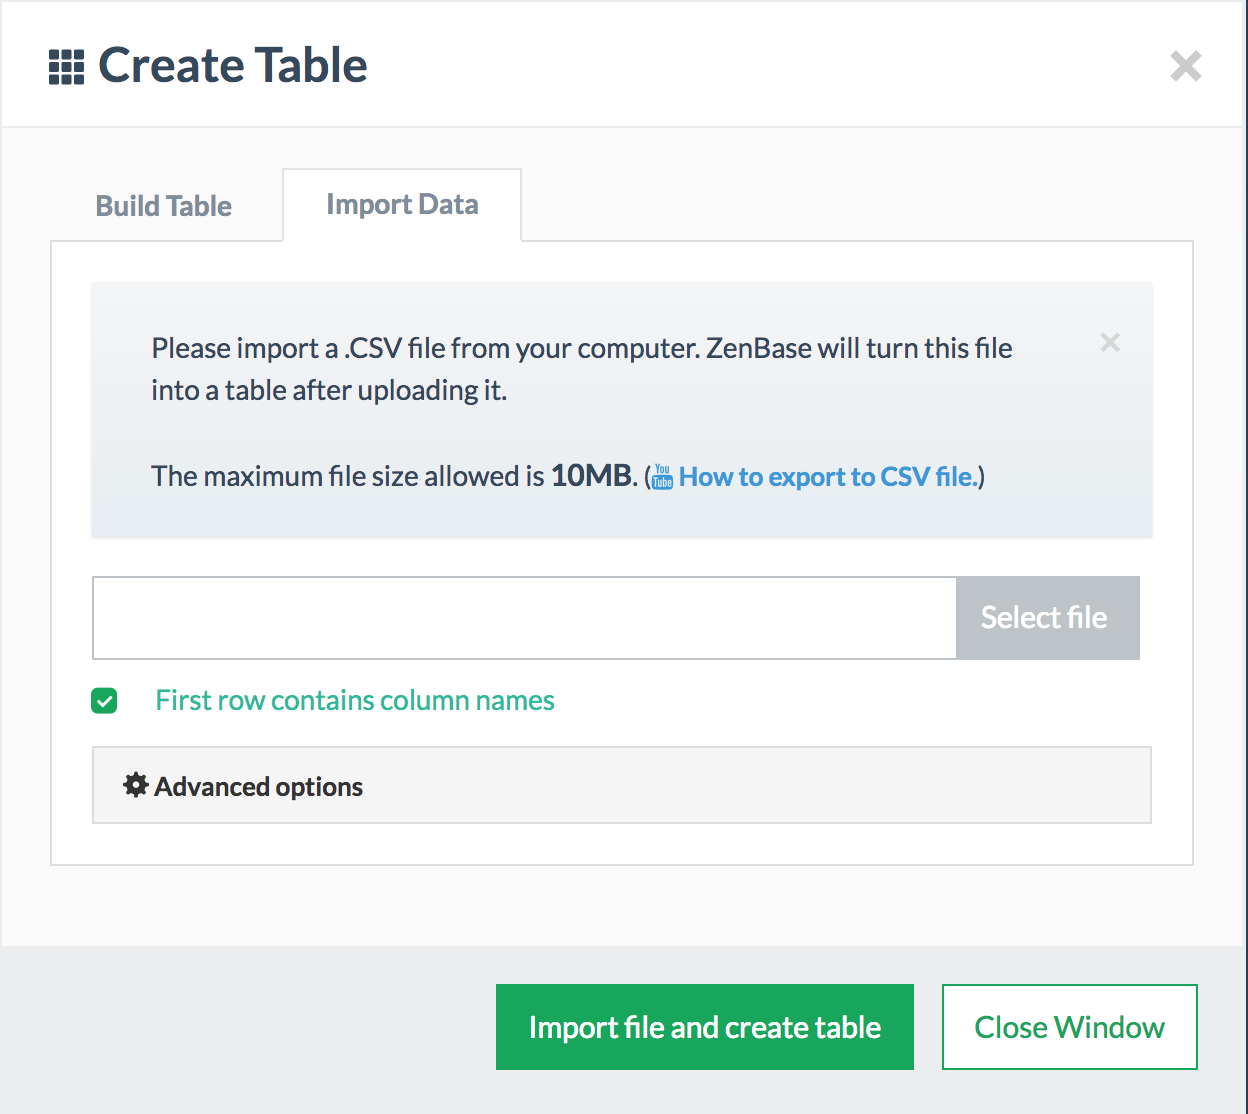
Next, you should choose the file you’d like to import. When importing a CSV file, it’s possible that your file contains the column names on the first line of the file, if this is the case, make sure you tick the checkbox labeled “First row contains column names“, this way ZenBase will use those column names to create your new table.